Hey there, I am Mikayel and I hope you will enjoy this topic! Today we are going to speak about the integration of Stripe into our NestJS application.
Before starting this topic, please have some investigations about this service and register on Stripe.

What is the Stripe?
Stripe is a payment service provider that lets merchants accept credit and debit cards or other payments. Its payment processing solution, Stripe Payments, is best suited for businesses that make most of their sales online, as most of its unique features are primarily geared toward online sales.
But as a Developer we are interested in using Stripe because it is so developer-friendly and have some good documentation.
Project logic
Let’s understand what we want from our project. We need an application, there will be 2 plans — monthly and yearly. Each user can subscribe to only one of these plans but can switch between them. Also, the user can cancel a subscription.
Okay, let’s create our project with Nest! First, you need to install NestJS on your computer, and after that create a new project with Nest CLI:
$ npm i -g @nestjs/cli
$ nest new project-name
I assume there won’t be any problems during installation. In my case, I prefer to use Yarn, but it will be the same for the Npm.
Great! After installing you need to install the Stripe package:
$ yarn add stripe
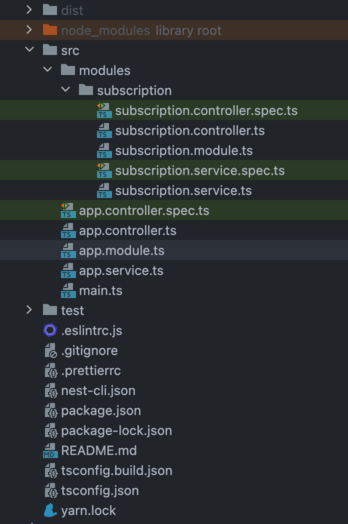
After installing Stripe it’s time to create SubscriptionModule in our project. You can create it manually or use Nest CLI for it which will add automatically the SubscriptionModule to the AppModule:
$ nest g module modules/subscription
$ nest g controller modules/subscription
$ nest g service modules/subscription
After successfully creating the SubscriptionModule, we can make some setup of the Stripe. If you have not installed nestjs/config package yet, run the following command:
$ yarn add @nestjs/config
It’s better to use your environment variables from the config file, not directly from .env. You can read this here from Nestjs official documentation.
Our config file looks like this:
import * as process from "process";
const configs = () => ({
  NODE_ENV: process.env.NODE_ENV || "development",
  GLOBAL: {
    PORT: process.env.PORT || 3000,
  },
  STRIPE_CONFIG: {
    apiKey: process.env.STRIPE_API_KEY,
    webhookConfig: {
      requestBodyProperty: "rawBody",
      stripeSecrets: {
        account: process.env.STRIPE_WEBHOOK_SECRET,
      },
    },
  },
});
export default configs;
… and we need to add ConfigModule to our AppModule:
import { Module } from "@nestjs/common";
import { AppController } from "./app.controller";
import { AppService } from "./app.service";
import { SubscriptionModule } from "./modules/subscription/subscription.module";
import { ConfigModule } from "@nestjs/config";
import configs from "./modules/config";

@Module({
  imports: [
    SubscriptionModule,
    ConfigModule.forRoot({
      isGlobal: true,
      load: [configs],
    }),
  ],
  controllers: [AppController],
  providers: [AppService],
})
export class AppModule {}
Now in your .env file, you need to add STRIPE_API_KEY field which is the secret key. You can find it in your Stripe account. After this step, we need to write our code. We will use webhooks technology.
When building Stripe integrations, you might want your applications to receive events as they occur in your Stripe accounts, so that your backend systems can execute actions accordingly.
Note, that the Stripe webhooks are using rawBody and we need to be ready to receive them. In main.ts file, we need to have the following:
import { NestFactory } from "@nestjs/core";
import { AppModule } from "./app.module";
import { ConfigService } from "@nestjs/config";

async function bootstrap() {
  const app = await NestFactory.create(AppModule, { rawBody: true });

  const configService = app.get(ConfigService);

  await app.listen(configService.get("GLOBAL.PORT"));
}
bootstrap();
If you follow the official documentation, then you need to register the webhook endpoint, which will catch the hooks. For this, we can use a package, which will help us with that.
$ yarn add @golevelup/nestjs-stripe
Next, it’s important to download Stripe CLI for testing webhooks. On Mac run the following command to install Stripe CLI:
$ brew install stripe/stripe-cli/stripe
Now you need to log in to your stripe account with CLI. After you log in, you need to run Stripe on your computer.
$ stripe listen --forward-to localhost:3000/stripe/webhook
When your Stripe application runs locally, on Stripe you can see, that there were added your local listener

Great, after your CLI starts working, it gives us a message with Stripe Webhook Secret, and this webhook secret we need to add to our .env file as STRIPE_WEBHOOK_SECRET. But we haven’t finished with webhooks yet, just paused here for now.
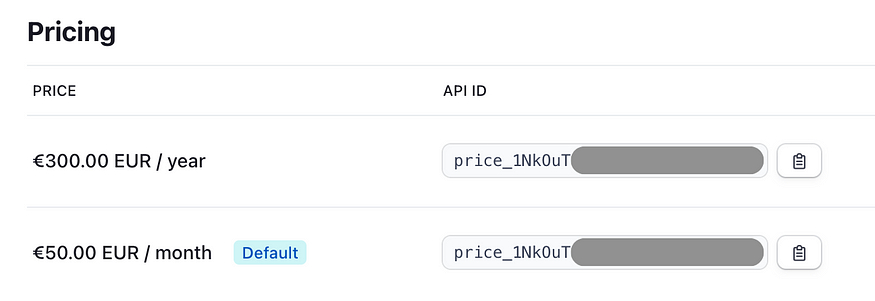
To create a subscription from the Backend side, we need to generate a checkout session for purchasing. But before that, we need to create a product with 2 prices, one for a monthly payment and one for yearly. Let’s create them manually. Each of them will be recurring, which means, that it will automatically buy a new subscription every month.
Okay, after these steps we are ready to write some code! …finally. We already installed golevelup/nestjs-stripe package, and it’s time to use it. We need to add the StripeModule to the SubscriptionModule. Add the following code to your imports in SubscriptionModule:
StripeModule.forRootAsync(StripeModule, {
imports: [ConfigModule],
useFactory: (configService: ConfigService) =>
configService.get('STRIPE_CONFIG'),
inject: [ConfigService],
}),
Now that we have 2 prices, the Frontend side needs to send one of them( depending if it’s yearly or monthly), when the user wants to create a subscription.
import { Body, Controller, Post, Req } from  '@nestjs/common';

import { SubscriptionService } from  './subscription.service';
import  Stripe  from  'stripe';

@Controller('subscriptions')
export  class  SubscriptionController {
constructor(private subscriptionService: SubscriptionService) {}

@Post()
createSubscriptionSession(
@Req() request,
@Body() priceId: string,
): Promise<Stripe.Response<Stripe.Checkout.Session> | undefined> {
return  this.subscriptionService.createSubscriptionSession(
request.user,
priceId,
);
}
P.s. It will be better to use Dtos instead of directly priceId, but I write like this to keep it simple. In final form, it will be with Dto.
To create a session we need a user, to know from BE what user is making a subscription. The point is we need to connect our users with Stripe customers. For example, you can create a customer in Stripe when creating a user in UserService. In this topic, we will not consider the user, what fields will it have, and how we will save a subscription in our database.
// this method should create a user in our database
async  userCreate(createUserDto: CreateUserDto): Promise<UserDto> {
// implement userCreate logic
...
const customerId = await  this.customerService.create({
email: createUserDto.email,
});
...
}

// this method should create a customer in Stripe
async  customerCreate(createCustomerDto: CreateCustomerDto): Promise<string> {
// this will return a customer object
const customer = await  this.stripe.customers.create(createCustomerDto);

return customer.id;
}
When we call the createSubscriptionSession() function, it creates a new session. In our subscription.service we will have this situation:
import { InjectStripeClient } from  '@golevelup/nestjs-stripe';
import { Injectable } from  '@nestjs/common';
import  Stripe  from  'stripe';

@Injectable()
export  class  SubscriptionService {
constructor(@InjectStripeClient() private stripe: Stripe) {}

async  createSubscriptionSession(
user: any, // we haven't a userDto, it's to keep it simple
priceId: string, // change it to your dto with validations
): Promise<Stripe.Response<Stripe.Checkout.Session> | undefined> {
try {
return  this.stripe.checkout.sessions.create({
success_url: 'https://example.com/',
customer: user.customerId, // it should not work
line_items: [
{
price: priceId,
quantity: 1,
},
],
mode: 'subscription',
});
} catch (error) {
console.error('Error from stripe:', error);
}
}
}
We need to understand what is going on here. At the moment of checkout.sessions.create, we need to give a success_url, customerId, lineItems, and mode.
- Success_url — URL where Stripe will redirect after successful payment.
- Customer — a customerId who is making a payment now.
- Line-items — A list of items the customer is purchasing.
- Mode — The mode of the Checkout Session. Pass subscription if the Checkout Session includes at least one recurring item.
You can read more about this here.
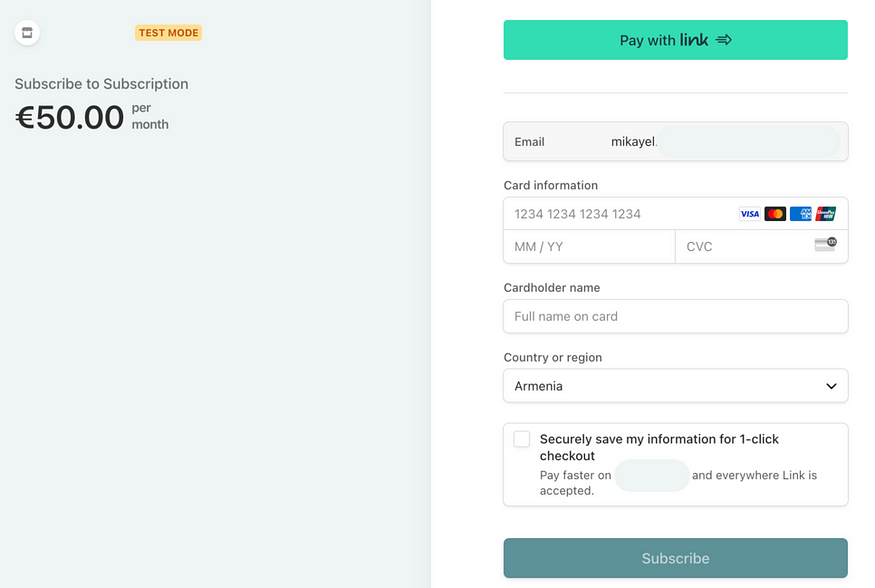
Next, when we are calling POST method for /subscriptions endpoint we can see…success! Now creating a new session returns a URL by using it we can buy a subscription.
Okay, now we have an endpoint by using it we can create a subscription, but it’s not the end. We need an endpoint to update/cancel a subscription. We can do 2 things with one endpoint, it’s called Billing Portal. But first, we need to setup our portal, no code is needed. https://dashboard.stripe.com/test/settings/billing/portal
Here you can customize your portal, for example, you can allow or not to switch between plans.
After finishing customizing our portal, we need to add it to our controller and service. Here is the code for the controller:
@Post('portal-session')
updatePlan(
@Req() request,
): Promise<Stripe.Response<Stripe.BillingPortal.Session>> {
return  this.subscriptionService.getPortal(request.user.customerId);
}
… and this for service:
async  getPortal(
customerId: string,
): Promise<Stripe.Response<Stripe.BillingPortal.Session>> {
return  this.stripe.billingPortal.sessions.create({
customer: customerId,
});
}
We’re left with the last part, we need to listen to our webhooks. For it we need to create a new service — StripeWebhookService:
import {
InjectStripeClient,
StripeWebhookHandler,
} from  '@golevelup/nestjs-stripe';
import { Injectable } from  '@nestjs/common';
import  Stripe  from  'stripe';

@Injectable()
export  class  SubscriptionWebhookService {
constructor(@InjectStripeClient() private stripe: Stripe) {}

@StripeWebhookHandler('customer.subscription.updated')
// implement here subscription create in our Database
async  handleSubscriptionUpdate(event: Stripe.Event): Promise<void> {
const dataObject = event.data.object  as  Stripe.Subscription;
// dataObject is the object which is sent by Stripe
// ...
}

@StripeWebhookHandler('customer.subscription.deleted')
// implement here subscription delete in our Database
async  handleSubscriptionDelete(event: Stripe.Event): Promise<void> {
const dataObject = event.data.object  as  Stripe.Subscription;
// ...
}
}
And that's all that we need! Now we can make a subscription, switch between plans, and even cancel our subscription. Only one thing is left, we need to test all of this.
For this, you can use Stripe CLI, for testing locally. We need to run Stripe locally and a second terminal for triggering events. For example:
$ stripe trigger customer.subscription.updated
After running this command in CLI, your application should catch this event and run the handleSubscriptionUpdate() function.
This topic is not a documentation of Stripe, you can learn more about Stripe in their official documentation.
Full project repository on Github -> https://github.com/mikayel00/stripeInit
Thank you for your attention. I hope you will find this topic helpful and interesting. Will see you soon. Best regards, Mikayel.
Comments
Loading comments…