A reliable apartment emergency charging kit should feel boring: predictable, quiet, and easy to use when you’re stressed. The goal is to keep communications and basic lighting going, not to recreate normal life. Good planning beats fancy gear, and a small kit beats an oversized one you never test.
This guide builds a practical system that fits most apartments. It focuses on realistic loads, safe setup, and simple routines. You’ll also see where solar panels can help as a refill option without turning your home into a constant project.
Start with a realistic power plan
Most apartment outages are about staying connected and comfortable for a short stretch. Start by writing down what you truly need: phone, a small light, and a way to get information. Add a laptop or router only if they’re essential to your situation, not just convenient.
Identify your “must-run” devices
List the devices you would regret losing first: your phone, a small LED light, and possibly a hotspot. Keep this list short. The fewer “must-runs,” the longer your stored energy lasts, and the less you depend on perfect sunlight for solar panels to matter.
Estimate time, not perfection
Pick a coverage target like 8, 12, or 24 hours. You don’t need a perfect spreadsheet. A rough plan keeps you from overspending and overcomplicating. If you’re frequently facing longer outages, that’s when solar panels become a sensible refill layer.
Build the kit in three layers
A no-drama kit works because it’s layered: immediate, short-term, and refill. This keeps daily usability high and reduces the chance you’ll forget a critical cable. Solar panels fit naturally in the refill layer, but the first two layers should stand alone.
Layer 1 for the first hour
This layer is for the “lights just went out” moment. It should be grab-and-go and always charged. Include a small flashlight or headlamp, a compact power bank, and the one cable that fits your phone. Keep it in a pouch you can find in the dark.
Layer 2 for the first day
This is your main battery layer for longer interruptions. It should comfortably handle phone charging plus at least one “bigger” job like a laptop charge or keeping a router alive. The best size is the one you’ll actually keep topped up, not the biggest you can buy.
Layer 3 for multi-day refill
When outlets are unavailable for longer than you planned, refill matters. That’s where solar panels can extend your kit during daylight hours. Treat solar panels as a topping strategy, not a guarantee, because shade, weather, and windows vary wildly in apartments.
Prevent the drains that kill your runtime
Most emergency kits fail from small habits: charging everything at once, leaving adapters plugged in, and letting devices idle at high brightness. Even with solar panels, your easiest “extra capacity” is simply reducing unnecessary load so your stored energy lasts longer.
Use a simple priority rule
When power is limited, decide what gets charged first and what waits. This reduces stress and makes your energy last. Use this exact sequence until it becomes automatic, even if you have solar panels available for refills later in the day.
- Charge the phone and a small light first
- Charge the hotspot or router only if you need connectivity
- Charge the laptop last, and only in short windows
Batch charging beats constant topping
Charge devices in scheduled blocks instead of constantly keeping everything at 100%. This avoids “stealth drains” and keeps your battery layer more stable. If you plan to use solar panels, batch charging also helps you match charging to your best sunlight window.
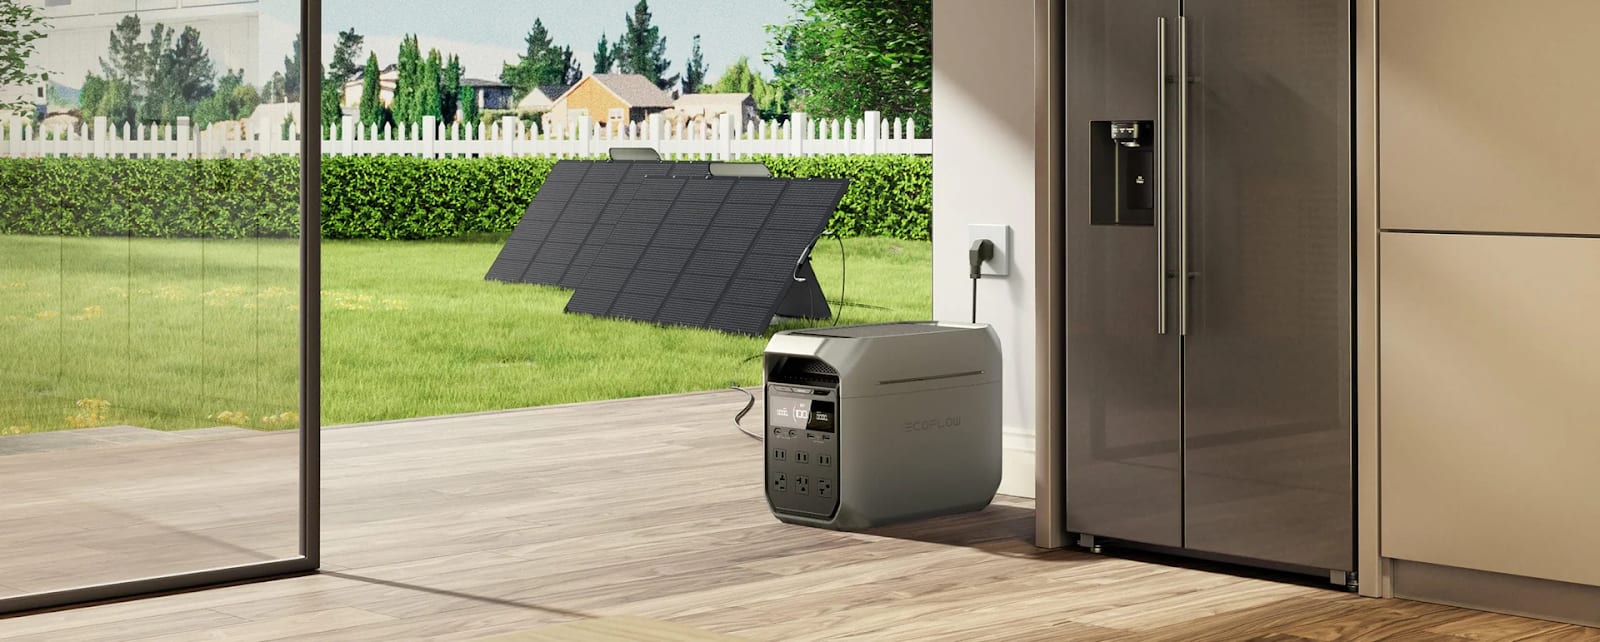
Add solar panels without turning it into a hobby
In apartments, solar panels work best when they’re quick to deploy and safe to store. You’re looking for repeatable placement, not hourly adjustments. A simple routine will outperform a technically “perfect” setup you hate using, especially during real outages.
Pick one safe spot and commit to it
Choose a location you can use consistently, such as a balcony corner or a window area that gets the most direct sun. Make sure nothing can tip, slide, or fall. Solar panels should never block exits or create trip hazards, and cables should be routed away from foot traffic.
Aim for your best sunlight window
Don’t chase the sun all day. Instead, aim solar panels toward the hours you reliably get sun, and leave them there. If your building only gives you a bright window in the morning, optimize for morning. If the balcony only clears shadows late, optimize for late afternoon.
- Set up solar panels at the start of your sunlight window
- Do a quick shade check after 15–20 minutes
- Pack up before wind or foot traffic becomes an issue
Make it apartment-safe, quiet, and neighbor-proof
The best kit is the one you can use without drama: no loud noise, no suspicious cords in hallways, and no clutter that spills into shared spaces. Solar panels should be stored neatly and deployed only where you’re allowed to place them safely.
Keep everything in one bin
Use a single tote or bin with labeled pouches: “phone,” “lighting,” “cables,” and “refill.” Labeling prevents the classic problem of hunting for the right adapter while your battery drains. If you use solar panels, keep the panel cable and any adapters in the same pouch every time.
Protect cables and connectors
Cables are a common failure point. Avoid tight bends, crushed connectors, and cheap spares that overheat or charge slowly. Keep one short cable and one longer cable, both dedicated to the kit. Clean connections make solar panels more reliable because input losses become easier to spot.
Test twice a year and fix weak links fast
An emergency kit is a system, and systems improve with testing. Run a simulated outage for one evening: use your lights, charge your phone, and keep your connectivity plan realistic. If solar panels are part of your kit, include them in the test on a normal day.
Run a short “outage drill”
A simple drill reveals problems early: missing cables, dead power banks, or lights that are too dim. It also shows whether solar panels fit your space or feel like a hassle. If setup annoys you during a drill, it will annoy you more during a real outage.
- Turn off nonessential devices for four hours
- Use only kit lighting and kit charging
- Note what felt hard, then simplify it immediately
Know when you’re done optimizing
Stop when your kit feels effortless. If your plan keeps your essentials running and solar panels provide a meaningful daytime top-off in your space, you’ve built a solid system. If solar panels don’t help due to shade or rules, remove them and strengthen your storage and habits instead.
Comments
Loading comments…