Xcode 27 is not just an AI update. It redesigns how iOS developers prototype, build, test, localize, profile, and ship apps.
Xcode 27 marks one of Apple’s biggest steps toward a smarter, more connected iOS development workflow. With coding agents, Device Hub, AI-assisted localization, improved performance diagnostics, and streamlined Xcode Cloud setup, it brings prototyping, development, testing, optimization, and delivery closer together in one environment.
Apple’s WWDC26 demo makes the direction clear: Xcode is no longer just an editor for writing Swift code and building apps. It is evolving into a complete workspace that helps developers move from an early idea to a tested, production-ready release with fewer context switches.
For iOS developers, the real value of Xcode 27 is not that “AI writes the code.” It is that Xcode helps you plan better, build faster, test across more scenarios, diagnose real-world issues, and ship with greater confidence.
1. Start by Customizing Xcode Around Your Workflow
The first noticeable change in Xcode 27 is the workspace.
Several controls that previously lived in the jump bar have moved into the Toolbar, including history navigation and editor controls. Build activity now appears beneath the window title, while the center of the Toolbar contains the new coding-agent entry point alongside the scheme and destination picker.
The right side of the Toolbar includes controls for tabs, editor panes, editor settings, and three editor modes:
- Canvas mode for previews and playgrounds.
- Assistant Editor mode for related content.
- Source-control review mode for reviewing changes.
The branch picker has moved to the bottom bar, giving long branch names more room.
More importantly, the Toolbar is now customizable. You can add, remove, and reorder controls to fit the way you work.
For a senior iOS developer, this is useful when switching between different types of work:
- SwiftUI development with previews visible.
- Pull-request review with source-control mode enabled.
- Debugging with the assistant editor open.
- AI-assisted implementation with coding-agent conversations in another tab.
2. Use Themes to Separate Projects and Reduce Context Switching
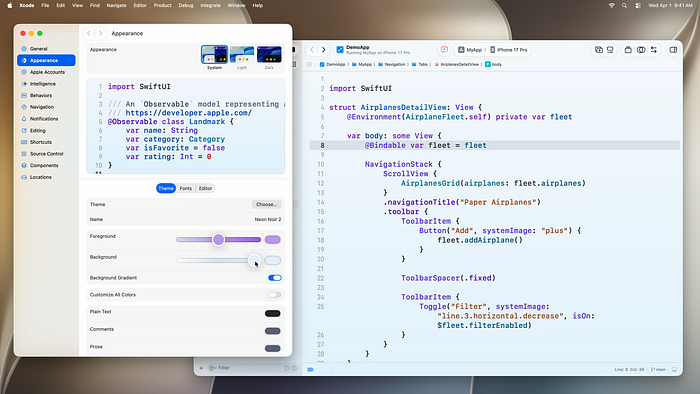
Xcode 27 introduces a redesigned theme system.
You can choose a preset theme or adjust text-colour intensity, background intensity, tint colours, fonts, and individual syntax colours. Increasing background intensity can create a more expressive workspace, especially in dark mode.
A useful detail from the WWDC demo is that themes can be saved per workspace.
This is more practical than it may sound.
For example:
- Use one theme for a production iOS app.
- Use another for a SwiftUI migration branch.
- Use a high-contrast theme during debugging.
- Use a separate visual identity for a client project.
When several Xcode windows are open, project-specific themes can reduce the risk of editing the wrong codebase.

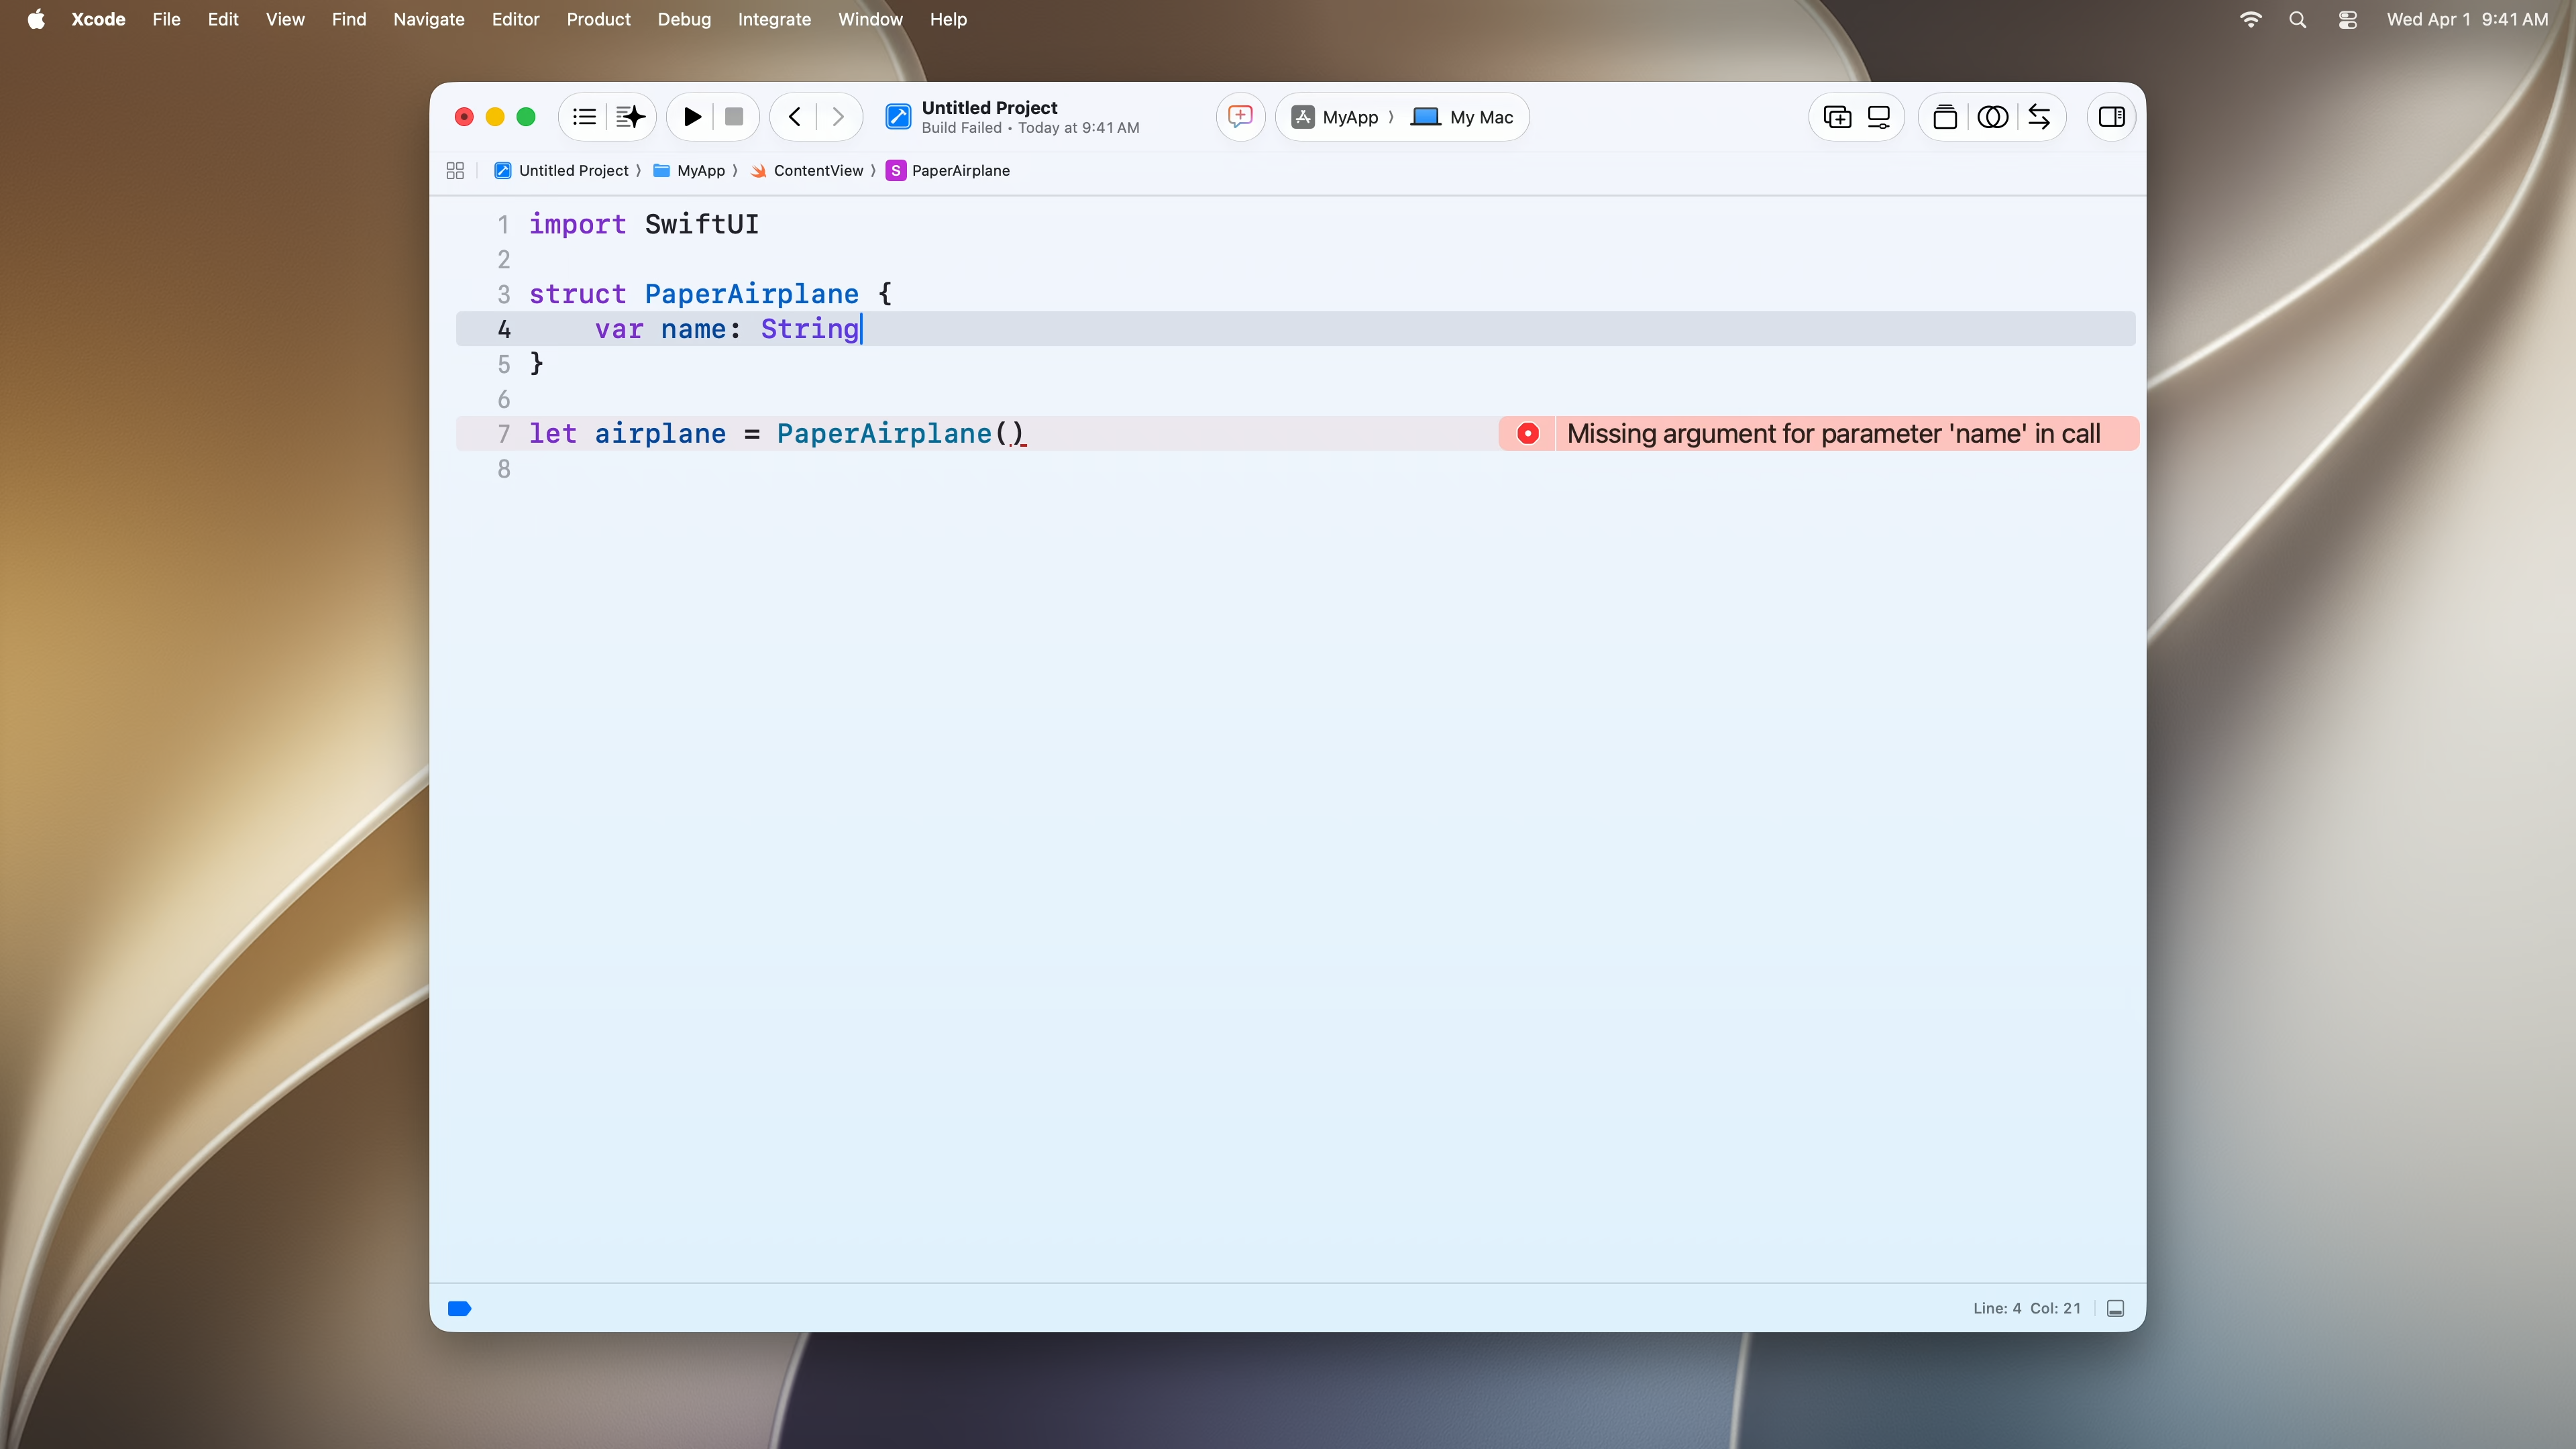
3. Live Issues Make Warnings Less Distracting
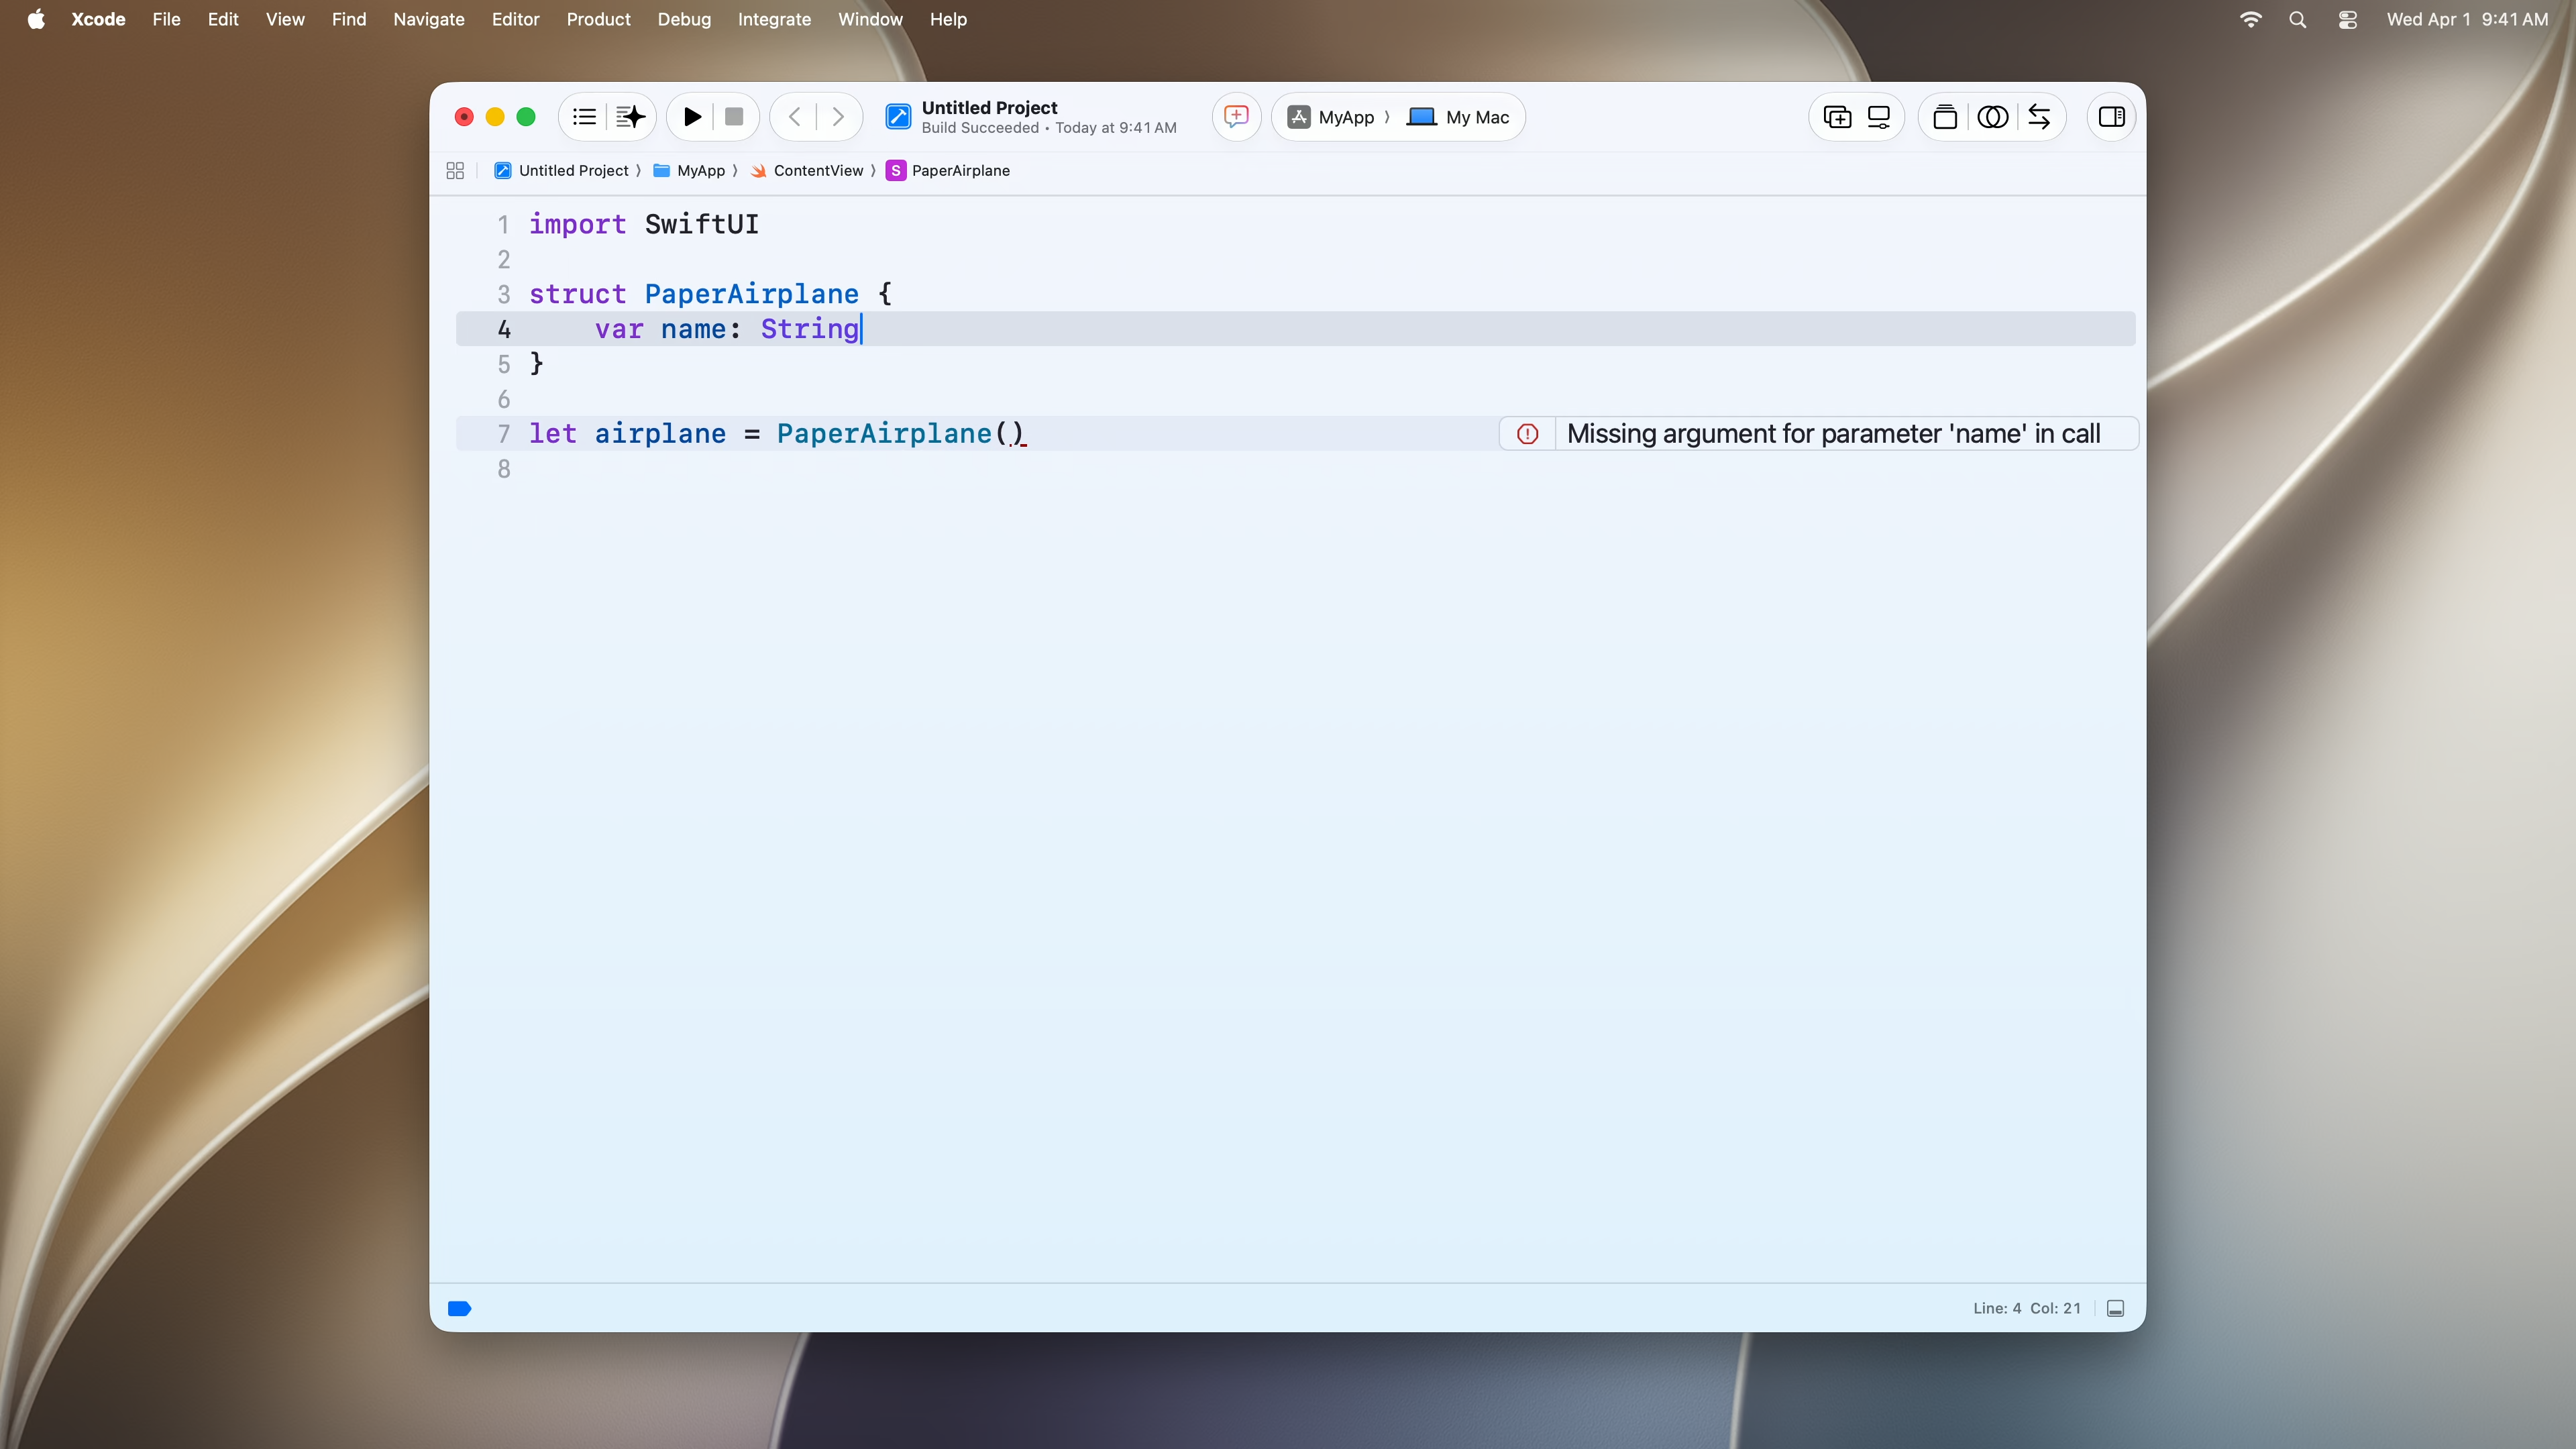
Xcode 27 changes how warnings and errors appear while typing.
Instead of immediately using high-intensity warning or error colours, Xcode can show predicted issues with a more subtle background. These are live predictions of what may fail when you build.
When you run a build, one of two things happens:
- The issue becomes a normal build warning or error.
- The issue disappears because your latest changes resolved it.
This small visual change is valuable during SwiftUI work, where rapid edits can temporarily create incomplete expressions, missing modifiers, invalid bindings, or type-checking issues.
The goal is to keep developers focused on the code they are writing rather than overwhelming them with warning colours during every intermediate edit.
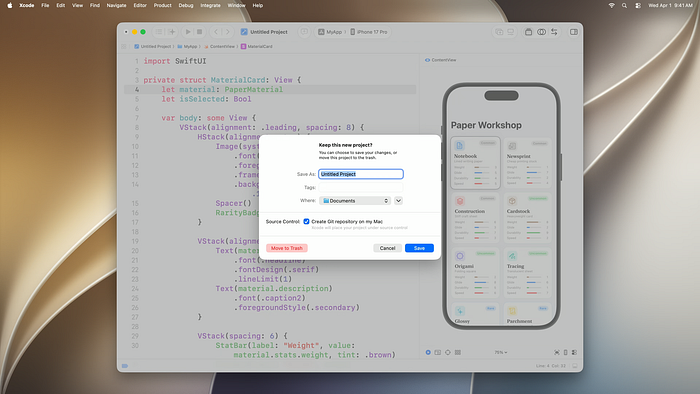
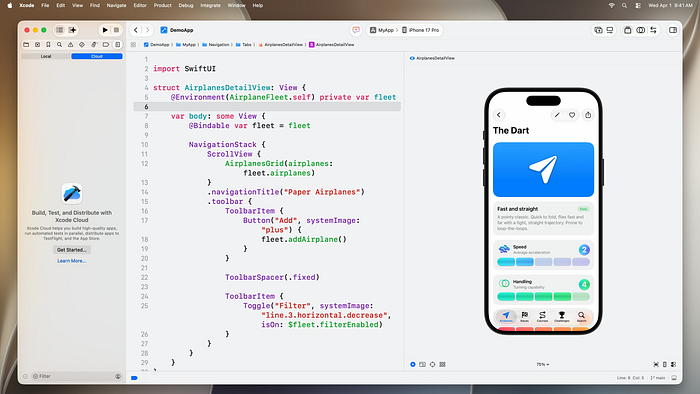
4. Prototype Faster with Untitled Projects and Standalone Swift Files
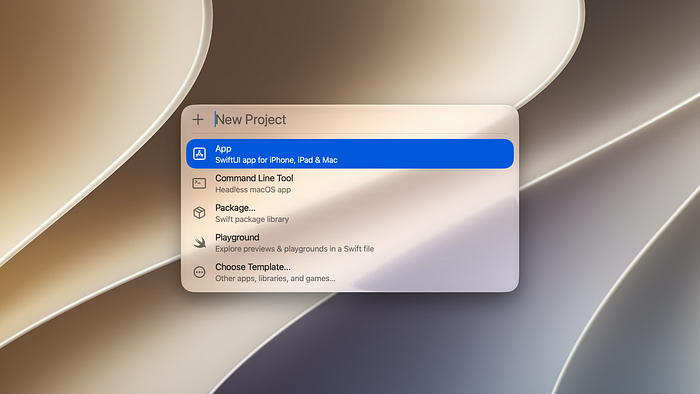
Xcode 27 introduces a simpler way to begin experimenting.
When creating a new project, you can choose from starting points such as:
- App
- Command Line Tool
- Swift Package
- Playground
When you select a starting point, Xcode can create an untitled project without immediately asking for a project name, organisation identifier, team, or save location.
This is useful for quick experiments.
For example, you may want to test:
- A new SwiftUI animation.
- A Foundation Models prototype.
- A CoreBluetooth proof of concept.
- A custom chart interaction.
- A new navigation flow.
- A Swift concurrency idea.
You can explore first, then save the work only when it becomes useful.
Xcode 27 also allows a standalone Swift file to open in its own workspace, including Playground results and UI previews. This is useful for sharing small SwiftUI experiments with your team without creating a full app project.
5. Treat Coding Agents as Planning Partners Before Treating Them as Implementers
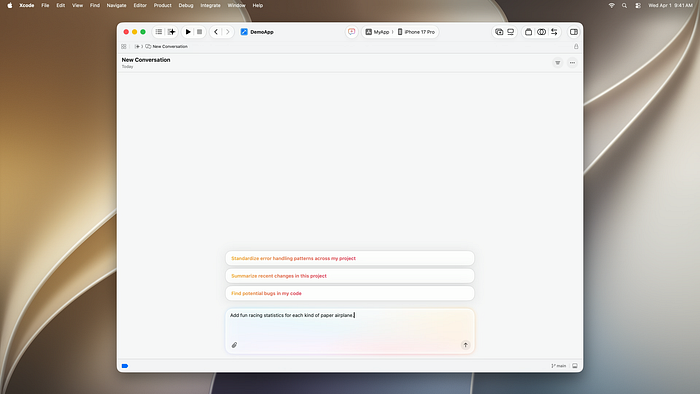
The most significant workflow update in Xcode 27 is the deeper integration of coding agents.
Agent conversations now live in the editor as tabs or split panes. This means an agent conversation can sit beside your source code, previews, test results, or source-control diff.
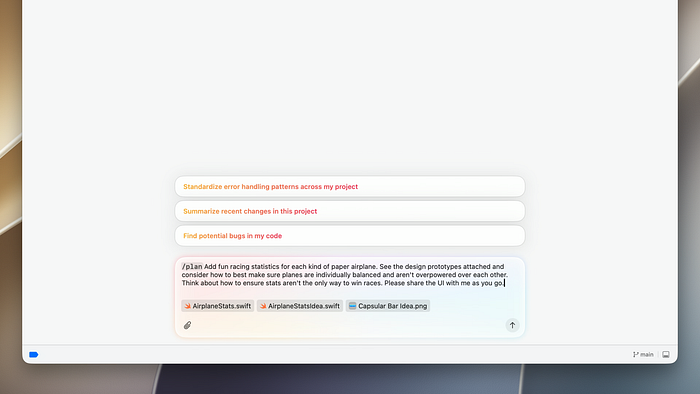
The strongest part of the workflow is not asking an agent to immediately change code.
It is using plan mode first.
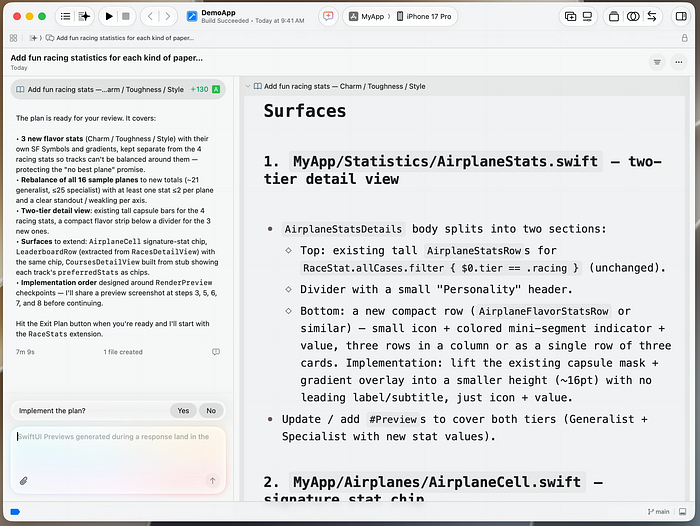
In the WWDC demo, Apple shows the /plan command. The agent gathers project context, investigates the request, and can run sub-agents in parallel — without changing code.
A good real-world prompt could be:
/plan
Review the current authentication module.
Identify:
- Where authentication state is stored.
- How refresh tokens are handled.
- Which ViewModels depend on authentication state.
- Risks of migrating this module from Combine to async/await.
Do not modify code.
Provide a phased implementation plan and test strategy.
Once the plan is ready, you can review it, leave inline feedback, and then allow the agent to implement the approved work.
This is the safer workflow:
- Ask the agent to explore.
- Request a plan.
- Review affected files and architectural impact.
- Approve a small implementation step.
- Build and test.
- Review the diff.
- Commit only after human review.
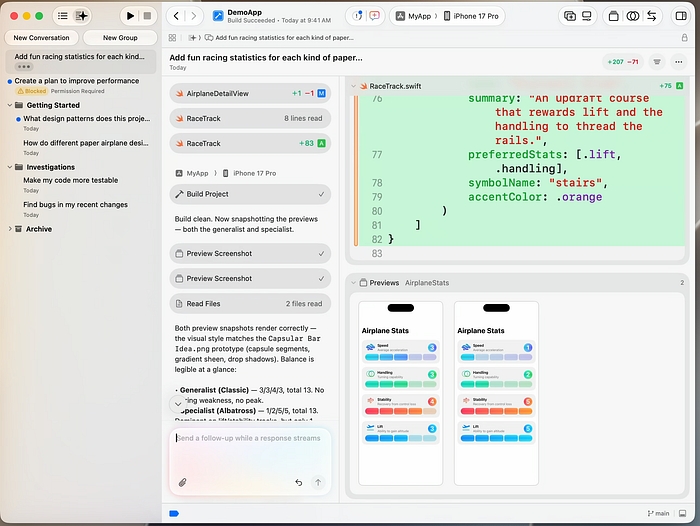
As the agent works, Xcode shows code changes on the right side of the conversation. Generated files, artifacts, previews, and screenshots also appear there.
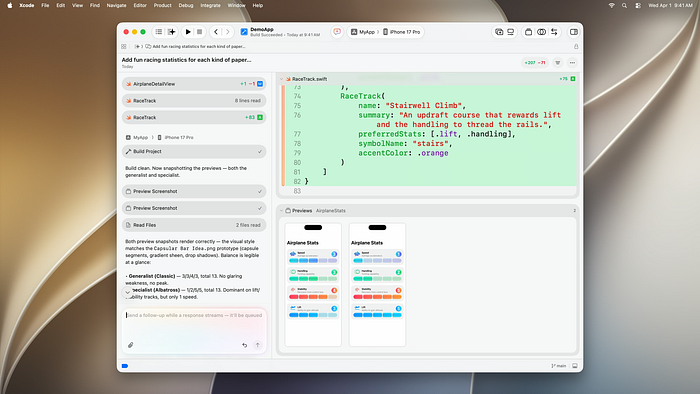
The coding assistant sidebar helps track multiple parallel conversations, unread messages, and tasks that require input.
The key point: coding agents can accelerate research, implementation, and test scaffolding, but they should not replace architecture review, security review, or engineering ownership.
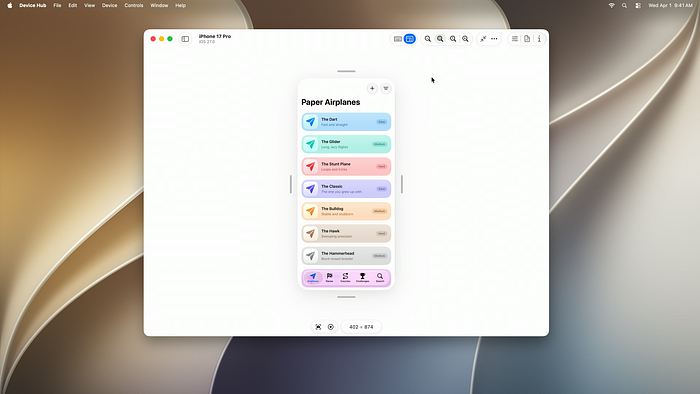
6. Use Device Hub as Part of Everyday QA
Device Hub is one of the most practical additions for iOS developers.
When you launch an app on a simulator, it opens in Device Hub. The compact mode provides quick actions such as:
- Going to the Home screen.
- Taking screenshots.
- Rotating the device.
When expanded, Device Hub provides more evaluation controls through the Inspector.
Apple’s demo specifically shows testing with:
- Increased contrast.
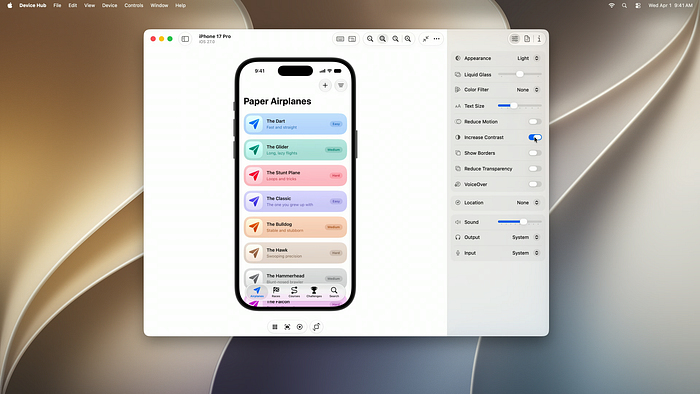
- Larger Dynamic Type sizes.
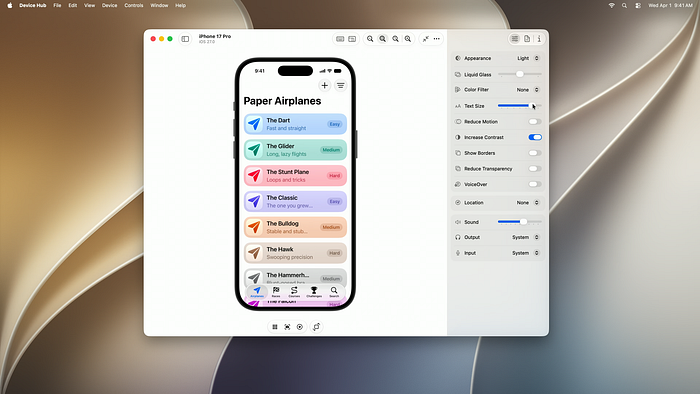
- Dark appearance.
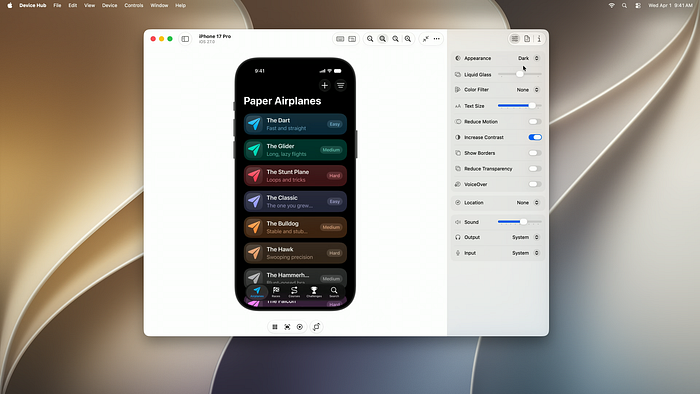
- Different window sizes.
- Different aspect ratios.
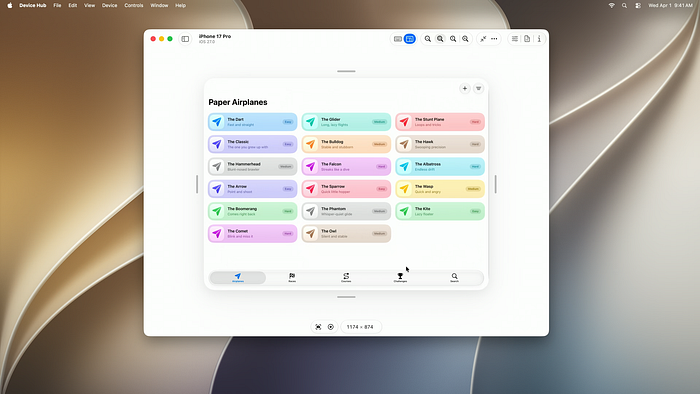
- iPhone Mirroring resize mode.
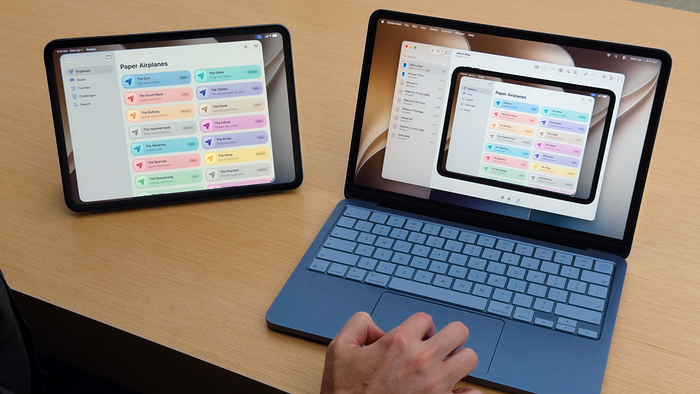
Device Hub combines simulators and connected physical devices in one sidebar. You can inspect and control a paired iPhone or iPad directly from your Mac.
For every SwiftUI screen, use this quick validation routine:
1. Default appearance.
2. Dark mode.
3. Larger Dynamic Type.
4. Increased contrast.
5. Small iPhone size.
6. Large iPhone size.
7. iPad layout.
8. Resizable iPhone Mirroring window.
This should become normal development work, not a final QA task.
7. Localize with Agents, Then Validate Like a Product Team
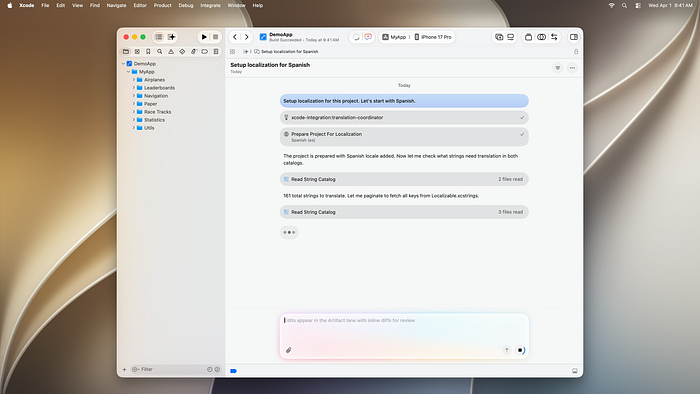
Localization is one of the strongest agent workflows shown in Xcode 27.
In Apple’s demo, the agent:
- Reads the project code.
- Identifies user-facing string literals.
- Makes code changes required for localization.
- Creates a String Catalog.
- Translates UI strings into Spanish.
The agent uses project context and language-specific style guidance from Xcode while creating translations.
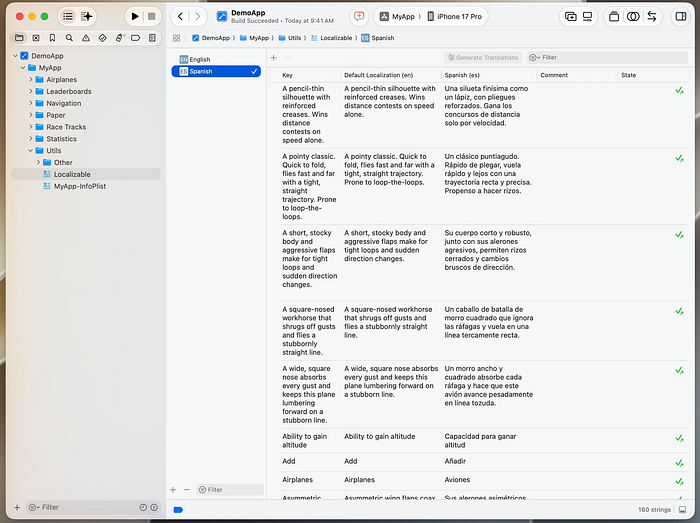
You can also select a language in the String Catalog and use the new Generate Translations action. The agent then works in the background while translation entries are added to the catalog.

A useful prompt could be:
Prepare this iOS app for Portuguese localization.
Tasks:
- Find hard-coded user-facing strings.
- Move appropriate strings into the String Catalog.
- Do not localize API keys, analytics events, debug logs, or identifiers.
- Generate Portuguese translations.
- List strings that require manual product or legal review.
Do not translate every language at once.
Start with one or two languages, run the app, and check:
- Truncated text.
- Awkward line wrapping.
- Layout overflow.
- Button sizes.
- Date and number formatting.
- Pluralisation.
- Product terminology.
TestFlight is especially useful here. Native speakers can submit translation feedback in the same way they submit feature feedback.
8. Use Organizer to Find the Most Important Production Problems First
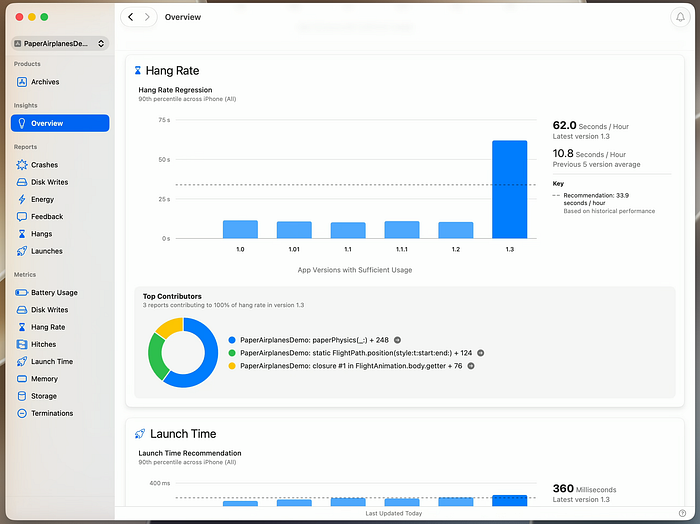
Organizer in Xcode 27 is more action-oriented.
The redesigned Overview puts diagnostics and metrics on the same page. A spike in a metric can be connected directly to diagnostics that show where developers should begin investigating.
Xcode 27 adds two important metrics:
Storage
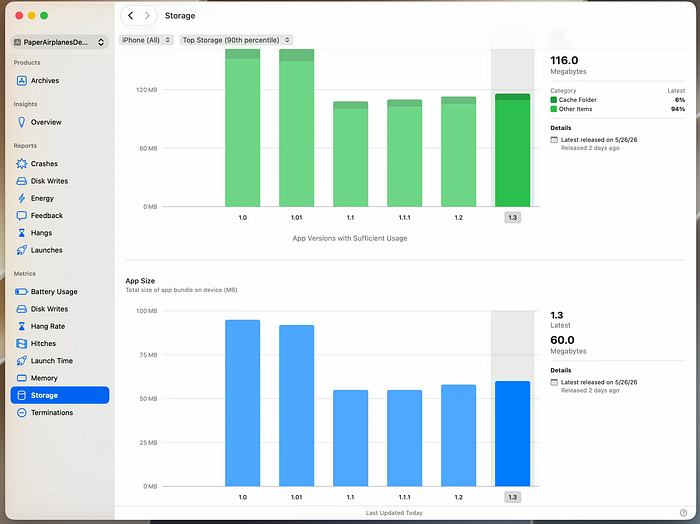
The Storage metric breaks down:
- Documents.
- App data.
- Binary size.
This matters because binary size affects download size and launch time, while documents and data affect the user’s available device storage.
Animation Hitches
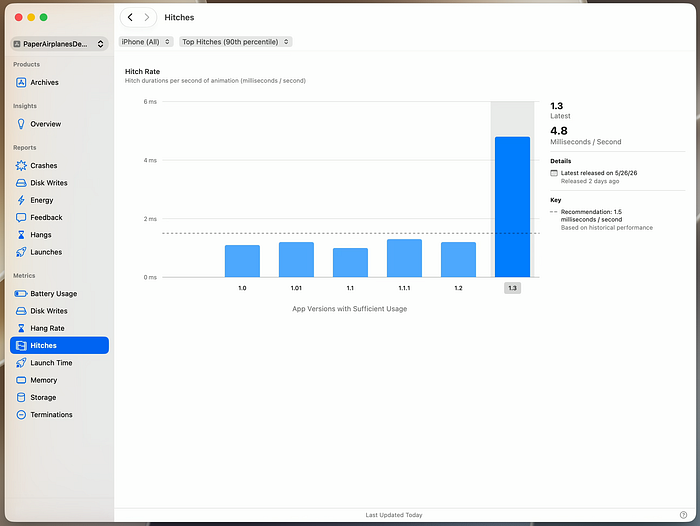
The updated hitch metric identifies performance issues beyond scrolling. Apple specifically highlights animations related to SwiftUI views and Liquid Glass.
Organizer also introduces Metric Goals, expanding the previous recommendation system. These goals are based on similar apps and your app’s historical baseline.
The supported areas include:
- Hang rate.
- Disk writes.
- Battery usage.
- Storage.
- Animation hitches.
Xcode 27 can also generate recommendations for some diagnostics, including hangs. The agent works with the diagnostic data and project context to help investigate possible causes and fixes.
Treat recommendations as an investigation starting point, not automatic production changes.
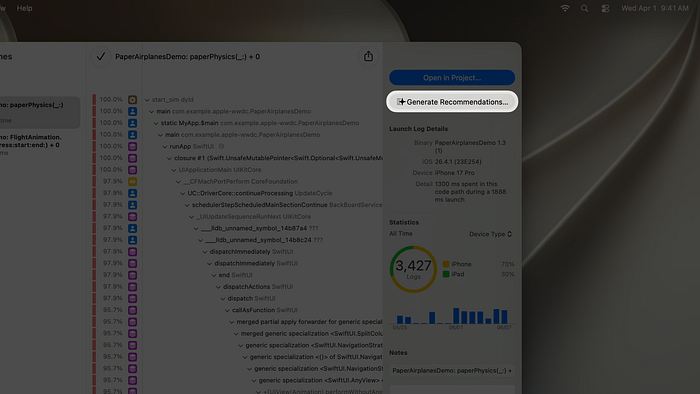
9. Use Top Functions in Instruments to Find the Real Bottleneck
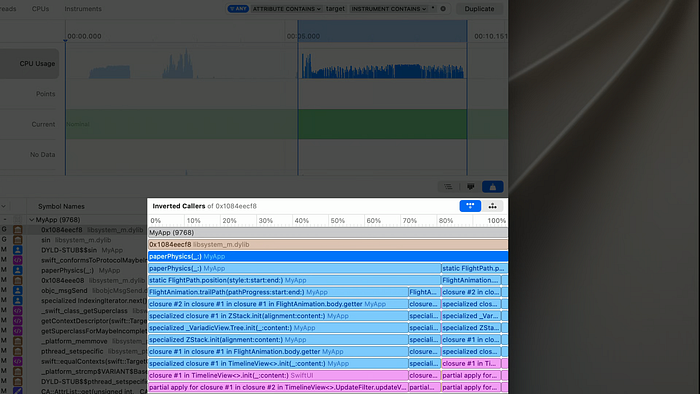
When an app feels slow, developers often guess.
Instruments helps replace guessing with evidence.
Xcode 27 introduces Top Functions, which highlights expensive functions in a selected time range. It is especially useful when an operation is repeatedly executed and consumes too much CPU time.
In the WWDC demo, Apple identifies a function called paperPhysics as the main performance cost. The issue turns out to be an accidental high-iteration loop left behind from debugging. Reducing the iteration count removes the animation hitch.
A practical profiling flow is:
- Reproduce the issue.
- Record the interaction in Instruments.
- Select the slow time range.
- Open Top Functions.
- Identify expensive repeated work.
- Fix the specific bottleneck.
- Record another run.
- Compare the before and after result.
This is especially relevant for SwiftUI apps where performance problems may come from:
- Sorting data inside
body. - Repeated date formatting.
- Image decoding during scrolling.
- Heavy calculations on the main actor.
- Excessive view updates.
- Large animation workloads.
- Expensive data transformations.
The lesson is simple: profile first, optimise second.
10. Start Xcode Cloud with Tests That Catch Real Regressions
Xcode Cloud remains Apple’s integrated CI/CD service for building, testing, TestFlight distribution, and App Store delivery.
In Xcode 27, setup is simplified.
Apple’s demo shows a short workflow:
- Click Get Started.
2. Confirm the app and developer team.
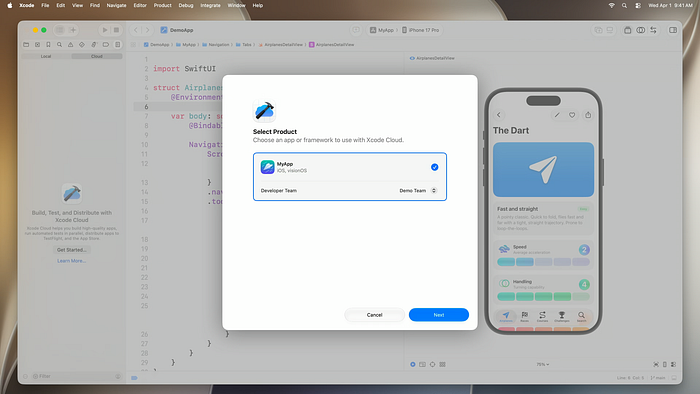
3. Connect the remote source-code repository.
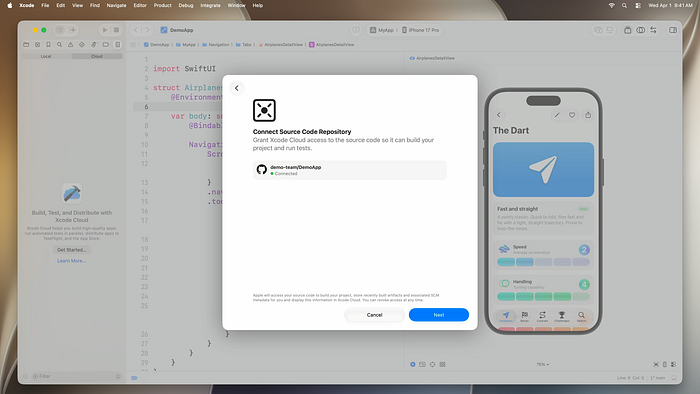
4. Start the first build.
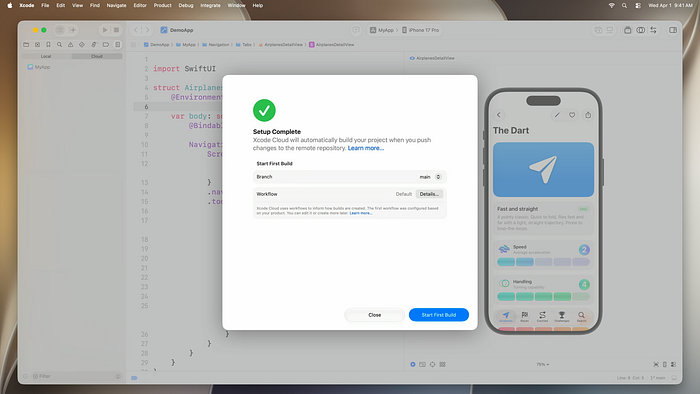
Xcode Cloud can then build and test the app in parallel across different devices, Xcode versions, and OS versions.
A sensible starting workflow for an iOS team is:
Pull requests:
- Build the app.
- Run unit tests.
- Run key UI smoke tests.
Main branch:

* Build the app.
* Run the full test suite.
* Upload successful builds to TestFlight.
  Release branch:
* Build an archive.
* Run release validation.
* Distribute to internal testers.
Do not begin with a huge CI pipeline.
Start with the checks that prevent your most common regressions.
A Practical Xcode 27 Adoption Plan
Week 1: Workspace and Device Hub
- Configure your Toolbar.
- Choose project-specific themes.
- Test Device Hub with Dynamic Type, dark mode, and iPad layouts.
- Capture accessibility issues in your existing screens.
Week 2: Coding Agents
- Use
/planfor one contained feature. - Review the implementation plan before approving edits.
- Use agents to generate unit-test scenarios.
- Keep all code review standards unchanged.
Week 3: Localization and Performance
- Localize one language through a String Catalog.
- Run the app and test common layout issues.
- Profile one slow screen in Instruments.
- Review Top Functions before attempting optimisation.
Week 4: Production and Delivery
- Review Organizer metrics from your latest release.
- Create one performance investigation task.
- Set up a basic Xcode Cloud workflow for builds and tests.
- Add TestFlight feedback steps for native-language reviewers.
Final Thoughts
Xcode 27 is not simply an update that adds AI to the editor.
It connects the development workflow from idea to release:
- Prototype with untitled projects.
- Investigate before changing code with plan mode.
- Review agent work inside the editor.
- Test simulators and devices through Device Hub.
- Localize through String Catalogs and agents.
- Investigate production issues with Organizer.
- Find performance bottlenecks with Top Functions.
- Protect releases through Xcode Cloud.
The best developers will not use Xcode 27 to avoid engineering work.
They will use it to spend less time on repetitive investigation and more time on architecture, product quality, accessibility, performance, and reliable releases.
Comments
Loading comments…