Angular ReactiveForms: Things About enable() and disable() That Could Surprise You

Reactive programming is everywhere these days, and so are reactive form controls. You’ve probably used functions like disable() and enable(), thinking they're harmless. But wait! These innocent-looking functions may cause you more trouble than you’d expect. Let’s dive deeper.
Definition
The disable() function is used in Angular to set the state of a FormControl, FormGroup, or FormArray to DISABLED. In this state, the control doesn’t go through validation checks and its value doesn’t affect the value of the parent FormGroup.
When the enable() is used, it sets the control's attribute disabledto false, allowing it to undergo validation again. The resulting status will depend on the control’s validity.
These functions are particularly useful when we need to dynamically manage the state of form controls based on user interactions or other conditions in your application.
disable(opts: { onlySelf?: boolean; emitEvent?: boolean; } = {}): void
enable(opts: { onlySelf?: boolean; emitEvent?: boolean; } = {}): void
Disabling FormControls
We have two ways to disable a control. Firstly, during the initialization of a FormGroup, we can set a new FormControl with the option disabled:true.
 formGroup = new FormGroup({
    name: new FormControl({ value: '', disabled: true }), // DISABLED
    surname: new FormControl(''), // ENABLED
  });
Alternatively, we can use the disable() at any point:
<form [formGroup]="formGroup">
    <input
      type="text"
      pInputText
      formControlName="name"
      placeholder="Name FormControl"
    />
</form>

<div class="buttons-gap">
    <button pButton (click)="enable()">Enable</button>
    <button pButton (click)="disable()">Disable</button>
</div>
disable() {
  this.formGroup.controls.name.disable();
}

enable() {
  this.formGroup.controls.name.enable();
}
HTML attribute ‘disabled’
It’s recommended to avoid using the ‘disabled’ attribute directly in the HTML template while working with Angular ReactiveForms. Instead, utilize the Angular ReactiveForms API to dynamically control the disabling behavior. This ensures a consistent and reactive approach to managing form controls throughout your application. By using functions like disable() and enable(), you gain more flexibility and control compared to the static 'disabled' attribute in the HTML, allowing for dynamic adjustments based on changing conditions and user interactions.
<input
    type="text"
    pInputText
    [disabled]="true"
    formControlName="name"
    placeholder="Name FormControl"
/>
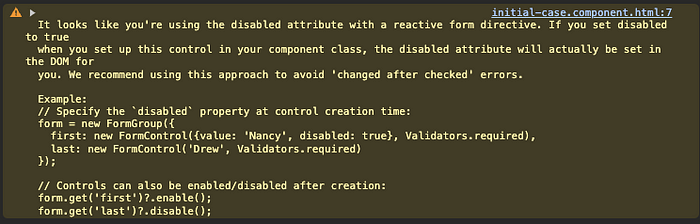
Angular provides us a warning log inside DevTools, if the ‘disabled’ attribute is utilized inside the component’s template.
It looks like you’re using the disabled attribute with a reactive form directive. If you set disabled to true
when you set up this control in your component class, the disabled attribute will actually be set in the DOM for
you. We recommend using this approach to avoid ‘changed after checked’ errors.
Example:
// Specify the `disabled` property at control creation time:
form = new FormGroup({
first: new FormControl({value: ‘Nancy’, disabled: true}, Validators.required),
last: new FormControl(‘Drew’, Validators.required)
});

// Controls can also be enabled/disabled after creation:
form.get(‘first’)?.enable();
form.get(‘last’)?.disable();
Warning for using the disabled attribute:
EmitEvent
Did you know that disable() and enable() triggers statusChanges and valueChanges? Let’s prove the point with a quick example. We added subscriptions to both valueChanges and statusChanges to our code.
// subject to send information that component was destroyed (to unsubscribe)
destroy$ = new Subject<void>();

// getter which will make code cleaner
get nameControl() {
  return this.formGroup.controls.name;
}

ngOnInit() {
  this.nameControl.statusChanges    // watch name FormControl status changes
    .pipe(takeUntil(this.destroy$)) // unsubscribe
    .subscribe((val) => {
      console.log(val);
  });
  this.nameControl.valueChanges     // watch name FormControl value changes
    .pipe(takeUntil(this.destroy$)) // unsubscribe
    .subscribe((val) => {
      console.log(val);
  });
}

ngOnDestroy(): void {
  this.destroy$.next();
  this.destroy$.complete();
}
Status and Value change trigger example:
What can go wrong?
Imagine a FormGroup for creating a user account with three FormControls — name, lastname, and username. In this scenario, the username is automatically generated by combining the name and lastname. Although this example may not directly involve disabled functionality, the fundamental principle remains the same, and the example is easy to understand.
export class InfinityLoopComponent implements OnInit, OnDestroy {
  destroy$ = new Subject<void>();

  formGroup = new FormGroup({
    name: new FormControl(''),
    surname: new FormControl(''),
    username: new FormControl(''),
  });

  get usernameControl() {
    return this.formGroup.controls.username;
  }

  ngOnInit() {
    this.formGroup.valueChanges
      .pipe(takeUntil(this.destroy$))
      .subscribe(({ name, surname }) => {
        try {
          this.usernameControl.setValue(`${name ? name + '.' : ''}${surname}`);
        } catch (e) {
          alert(e);
          console.error(e);
        }
      });
  }

  ngOnDestroy(): void {
    this.destroy$.next();
    this.destroy$.complete();
  }
}
Range error — infinity loop:
Oops, what went wrong?
- We are subscribing to the form
valueChanges. - Modification of the
nameFormControl triggers the FormGroup’svalueChanges - This, in turn, updated the
username, causing another trigger of the FormGroup’svalueChanges. - This loop continues until it hits a breaking point and throws a ‘Maximum call stack size exceeded’ error.

The solution to avoid the recursive triggering of events is to include emitEvent: false.
Usage of { emitEvent: false }as a parameter of disable() or enable() functions call ensures that no additional events are emitted during the control state change. This can be particularly useful when we want to make changes to a form control programmatically without triggering a cascade of events. Essentially, it allows us to perform the state modification quietly, without generating additional events, helping you manage the flow of your application more efficiently.
Comparison between emitEvent false and true:
Now let’s fix the previous example:
// removed old code, which caused error
// this.usernameControl.setValue(`${name ? name + '.' : ''}${surname}`, );

// working code - added { emitEvent: false }
 this.usernameControl.setValue(`${name ? name + '.' : ''}${surname}`, {
    emitEvent: false,
  });
Fixed infinity loop example:
Disabled — null values
The problem:
Disabling FormControls has a notable side effect: it sets the values for all FormControls within the entire FormGroup to null, regardless of their existing values. This behavior can lead to unintended consequences, affecting the overall state of the form.
Let’s dive into the next code example to explore this issue further.
export class DisabledValueComponent {
  destroy$ = new Subject<void>();

  formGroup = new FormGroup({
    name: new FormControl('Joe'),
    surname: new FormControl('Doe'),
  });

  get nameControl() {
    return this.formGroup.controls.name;
  }

  get surnameControl() {
    return this.formGroup.controls.surname;
  }

  changeNameState() {
    this.nameControl.disabled
      ? this.nameControl.enable()
      : this.nameControl.disable();
  }

  changeSurnameState() {
    this.surnameControl.disabled
      ? this.surnameControl.enable()
      : this.surnameControl.disable();
  }

  ngOnDestroy(): void {
    this.destroy$.next();
    this.destroy$.complete();
  }
}
Take a guess at the value of each line in the following code snippet:
// change state to DISABLED
this.changeNameState();

// log name value
console.log(this.nameControl.value);

// log whole form value
console.log(this.formGroup.value);

Revealing the results in example:
Effects on FormGroup value when disabling FormControls:
- Both the
nameandsurnameare initialized with default values, and the FormGroup’s value contains both attributes. - After disabling the
nameFormControl, its value persists when accessed directly. However, the FormGroup value no longer includes the ‘name’ value. - When we re-enable the FormControl, its value seamlessly reintegrates into the FormGroup.
An interesting approach to retrieve even disabled values is through getRawValue().
// logs also disabled FormControls
console.log(this.formGroup.getRawValue());
OnlySelf
The onlySelf option takes responsibility for notifying the parent FormControl about changes. By default, it is set to false. When we set this option to true, we limit the change observation to the FormControl itself, excluding its parent. Let’s illustrate this with a demonstration.
Summary
And there you have it! Throughout this article, we’ve explored various examples of both enable() and disable(). Beginning with the basics, we delved into the available options and addressed potential challenges that may arise.
I believe that you’ve gained valuable insights from these demonstrations. If you’ve discovered something new or have any questions, feel free to share your thoughts in the comments section below. Happy coding!
You can find code examples in my GitHub repository:
Comments
Loading comments…